Upload and connect models
Start from the dashboard
Section titled “Start from the dashboard”Use the integration guides for the full setup details:
Open the Frame dashboard, choose Add Model, and then pick one of the two upload paths:
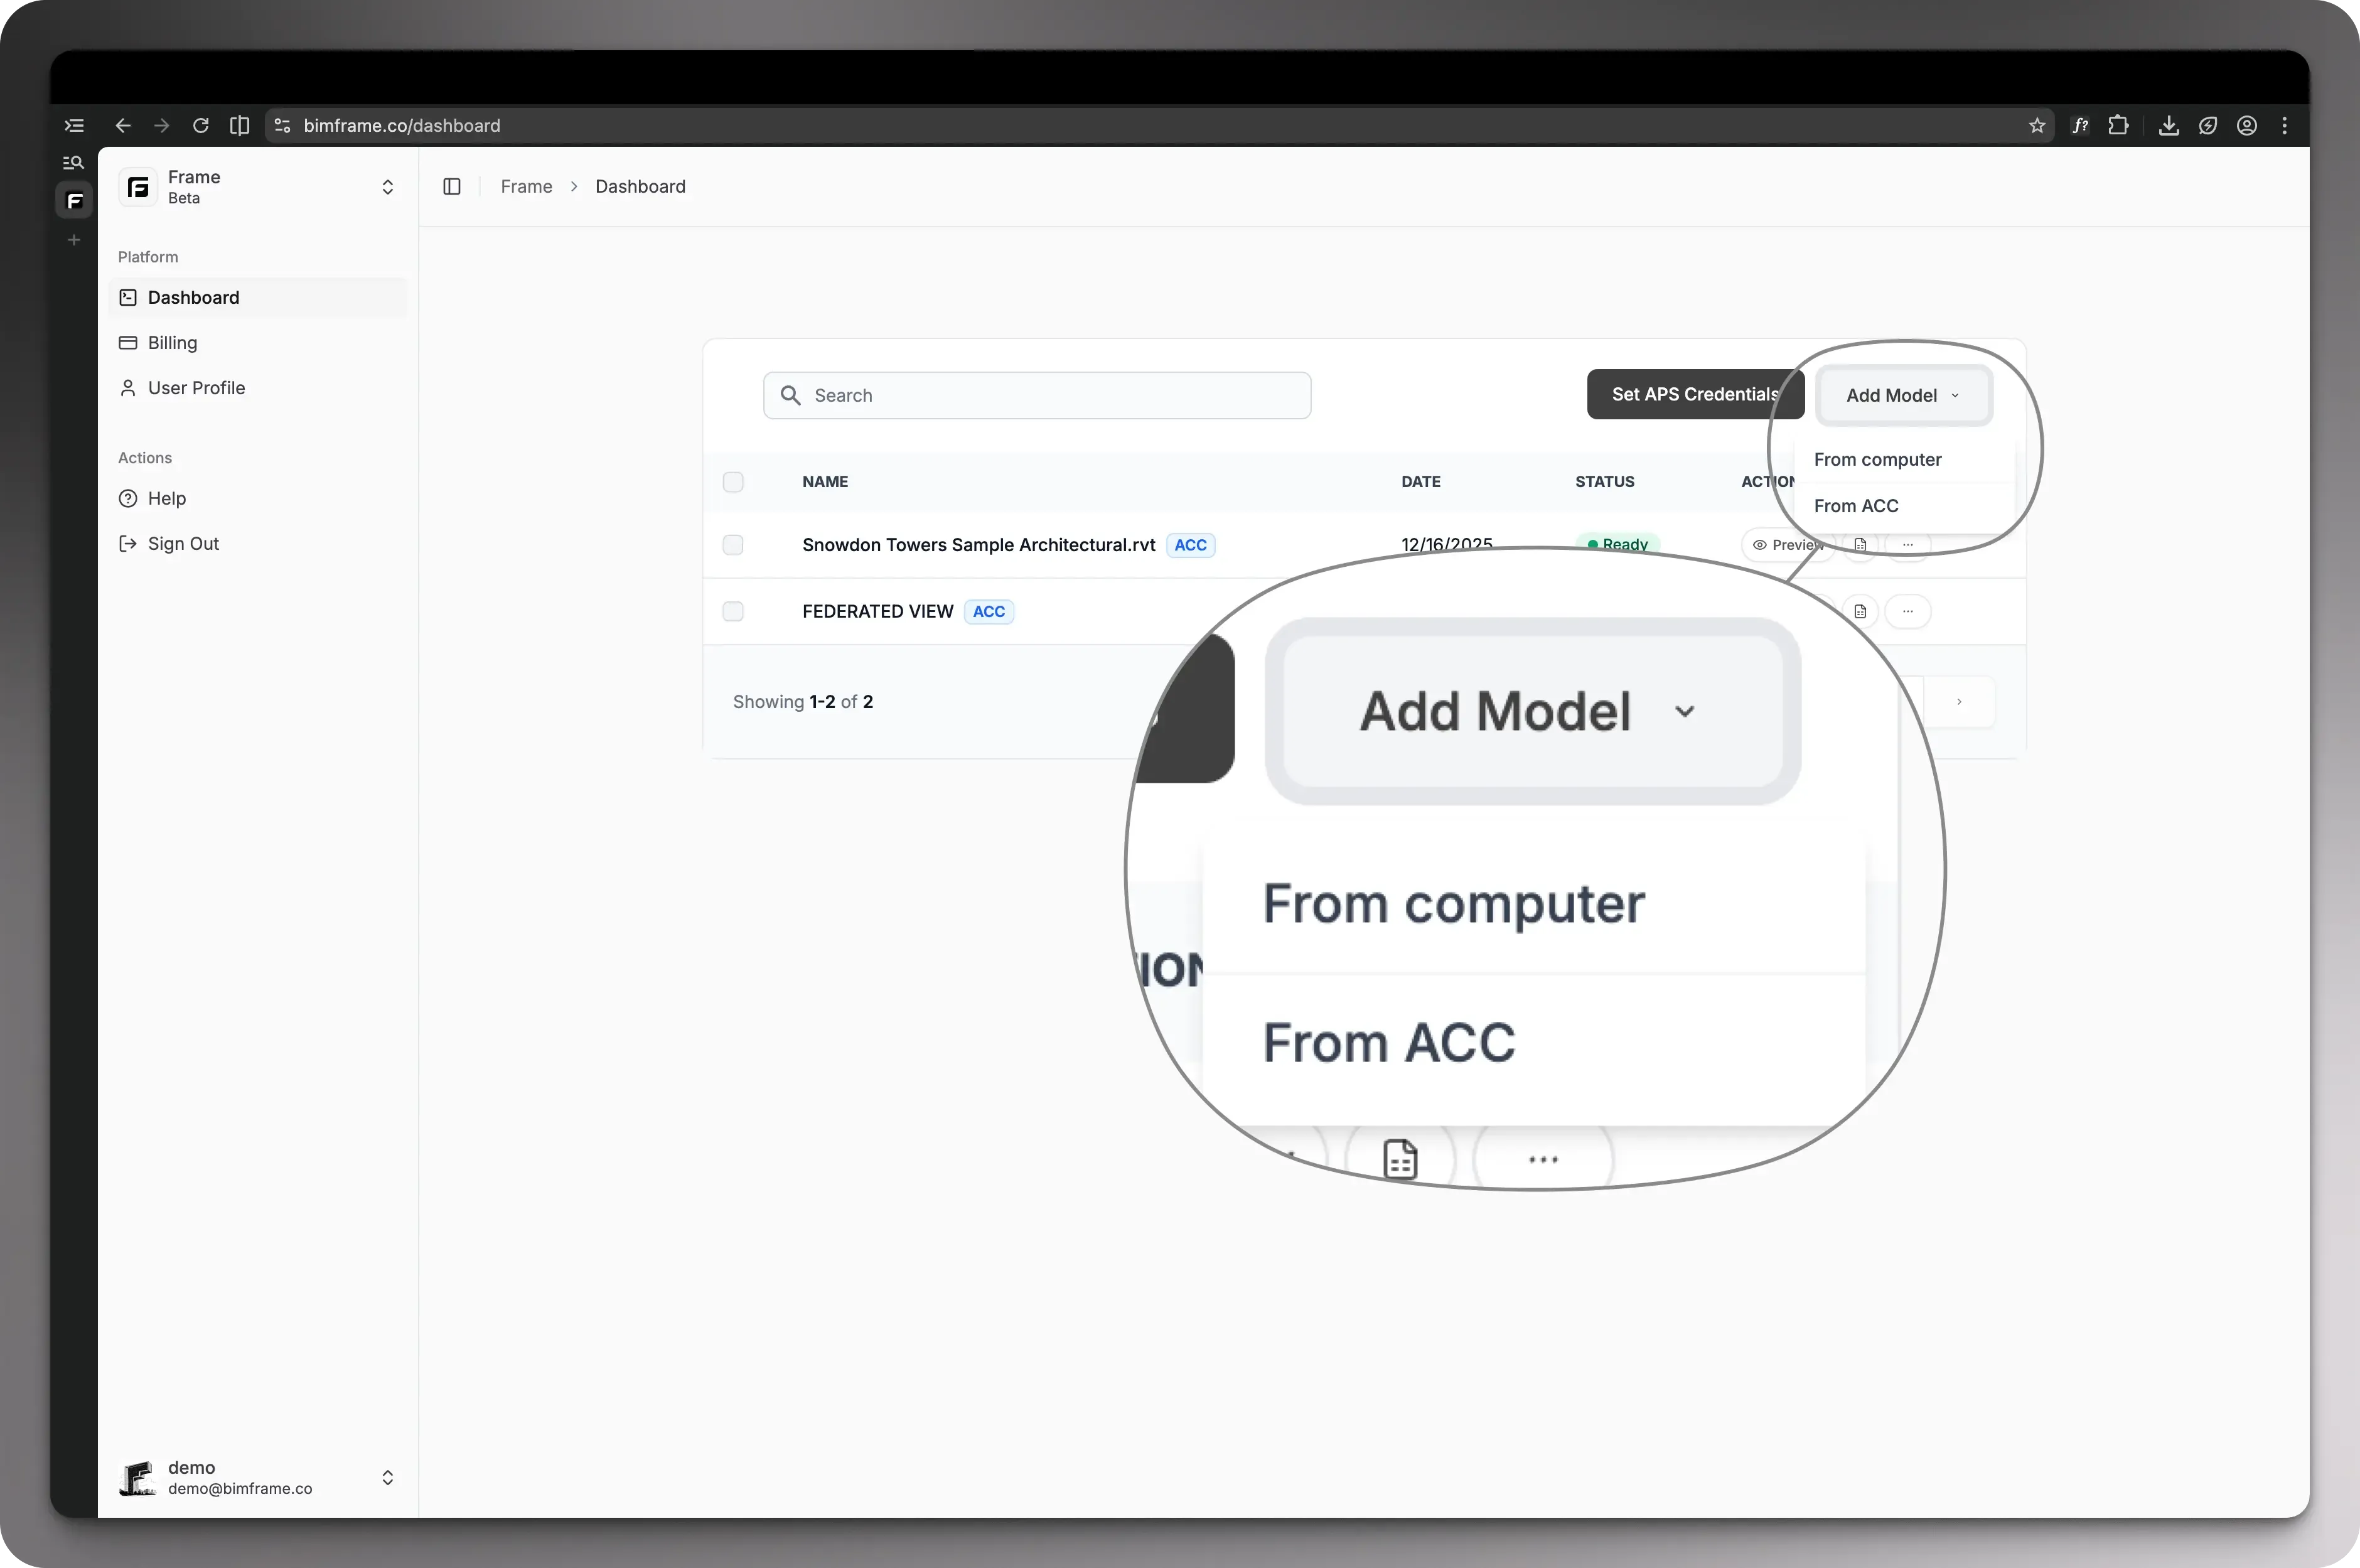
- Local upload for models stored on your device.
- Autodesk Construction Cloud (ACC) for models already managed in ACC.
Use the path that matches where your source data lives.
Upload methods
Section titled “Upload methods”Local upload
Section titled “Local upload”Choose Local upload when your model files are stored on your computer or in
shared folders outside ACC. This path is typically used for RVT, NWD,
IFC, or ZIP packages that contain the main model and any linked files.
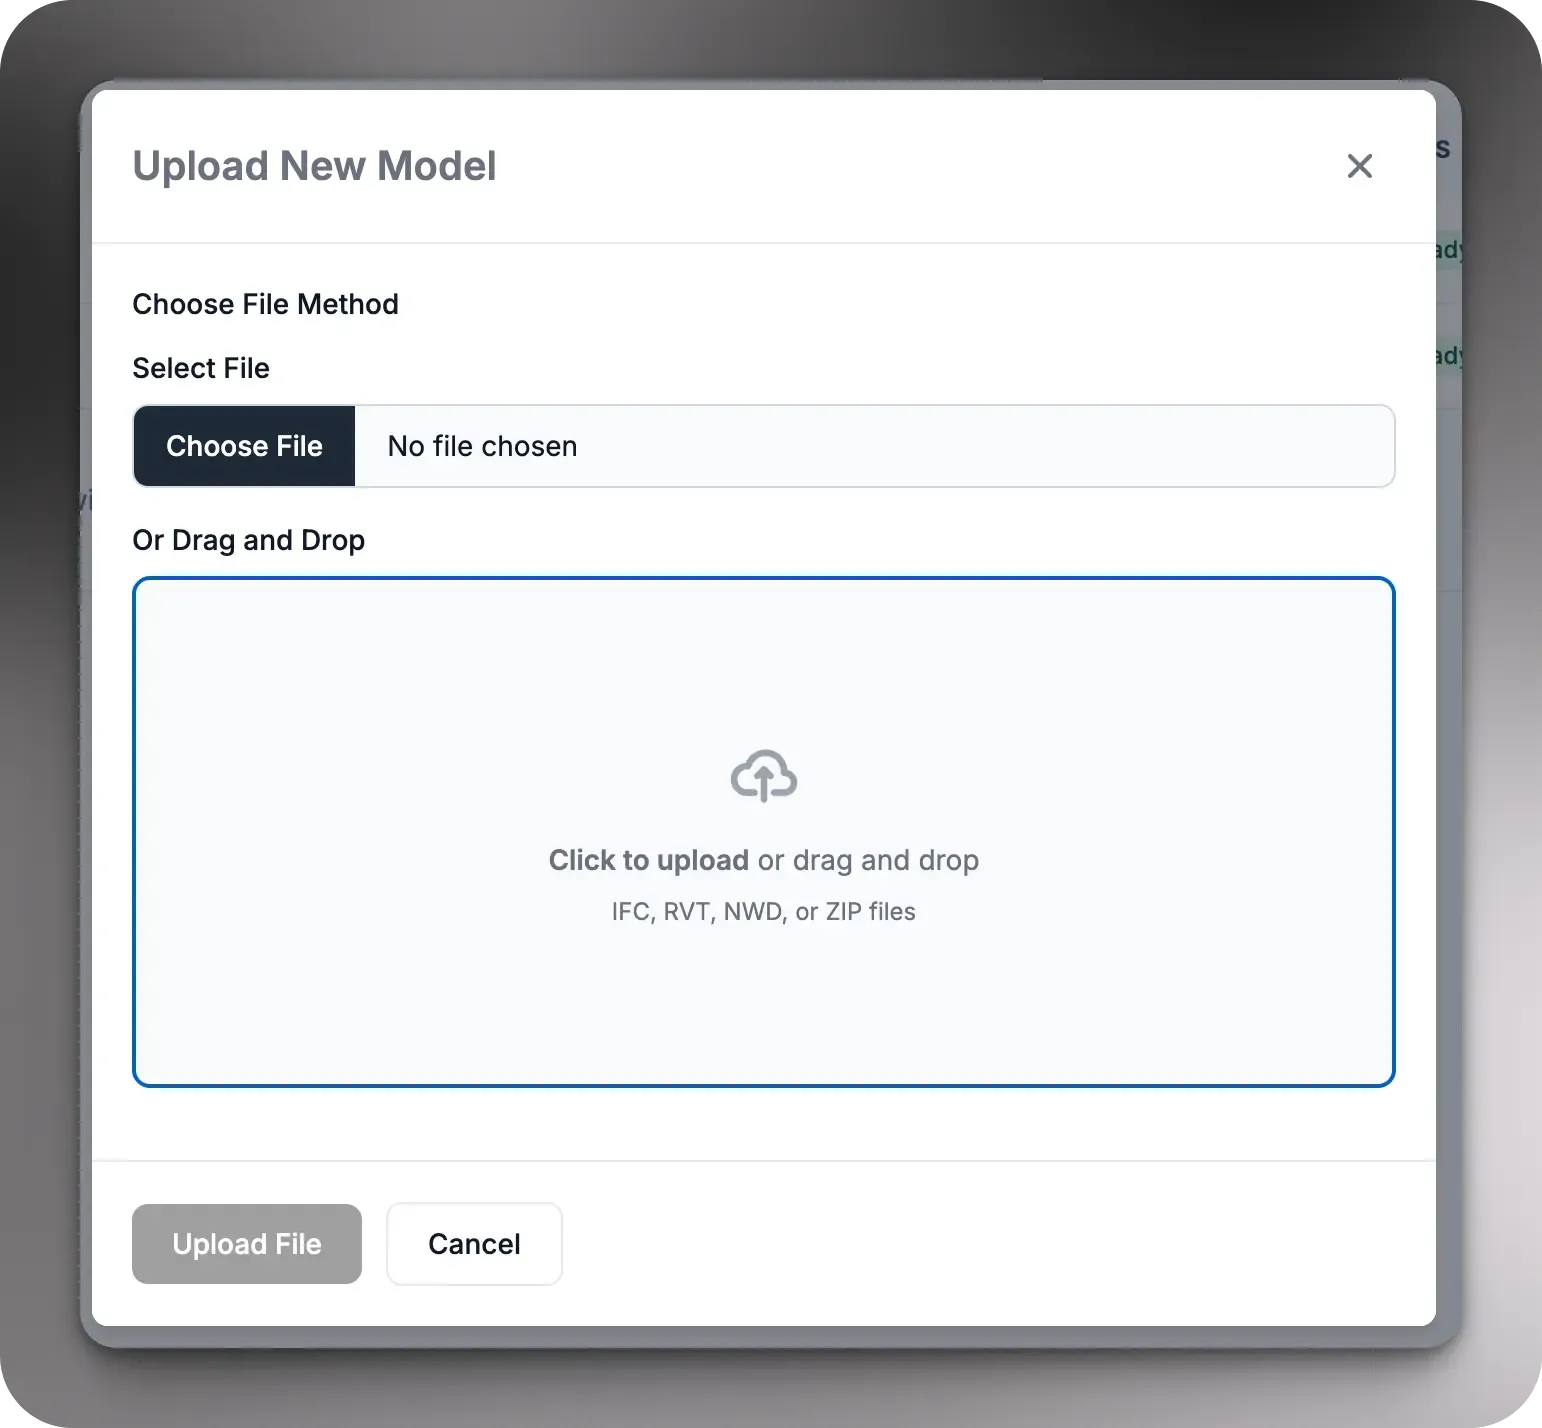
After you select the file, Frame uploads it, translates it, and prepares it for viewer and reporting workflows.
ZIP upload
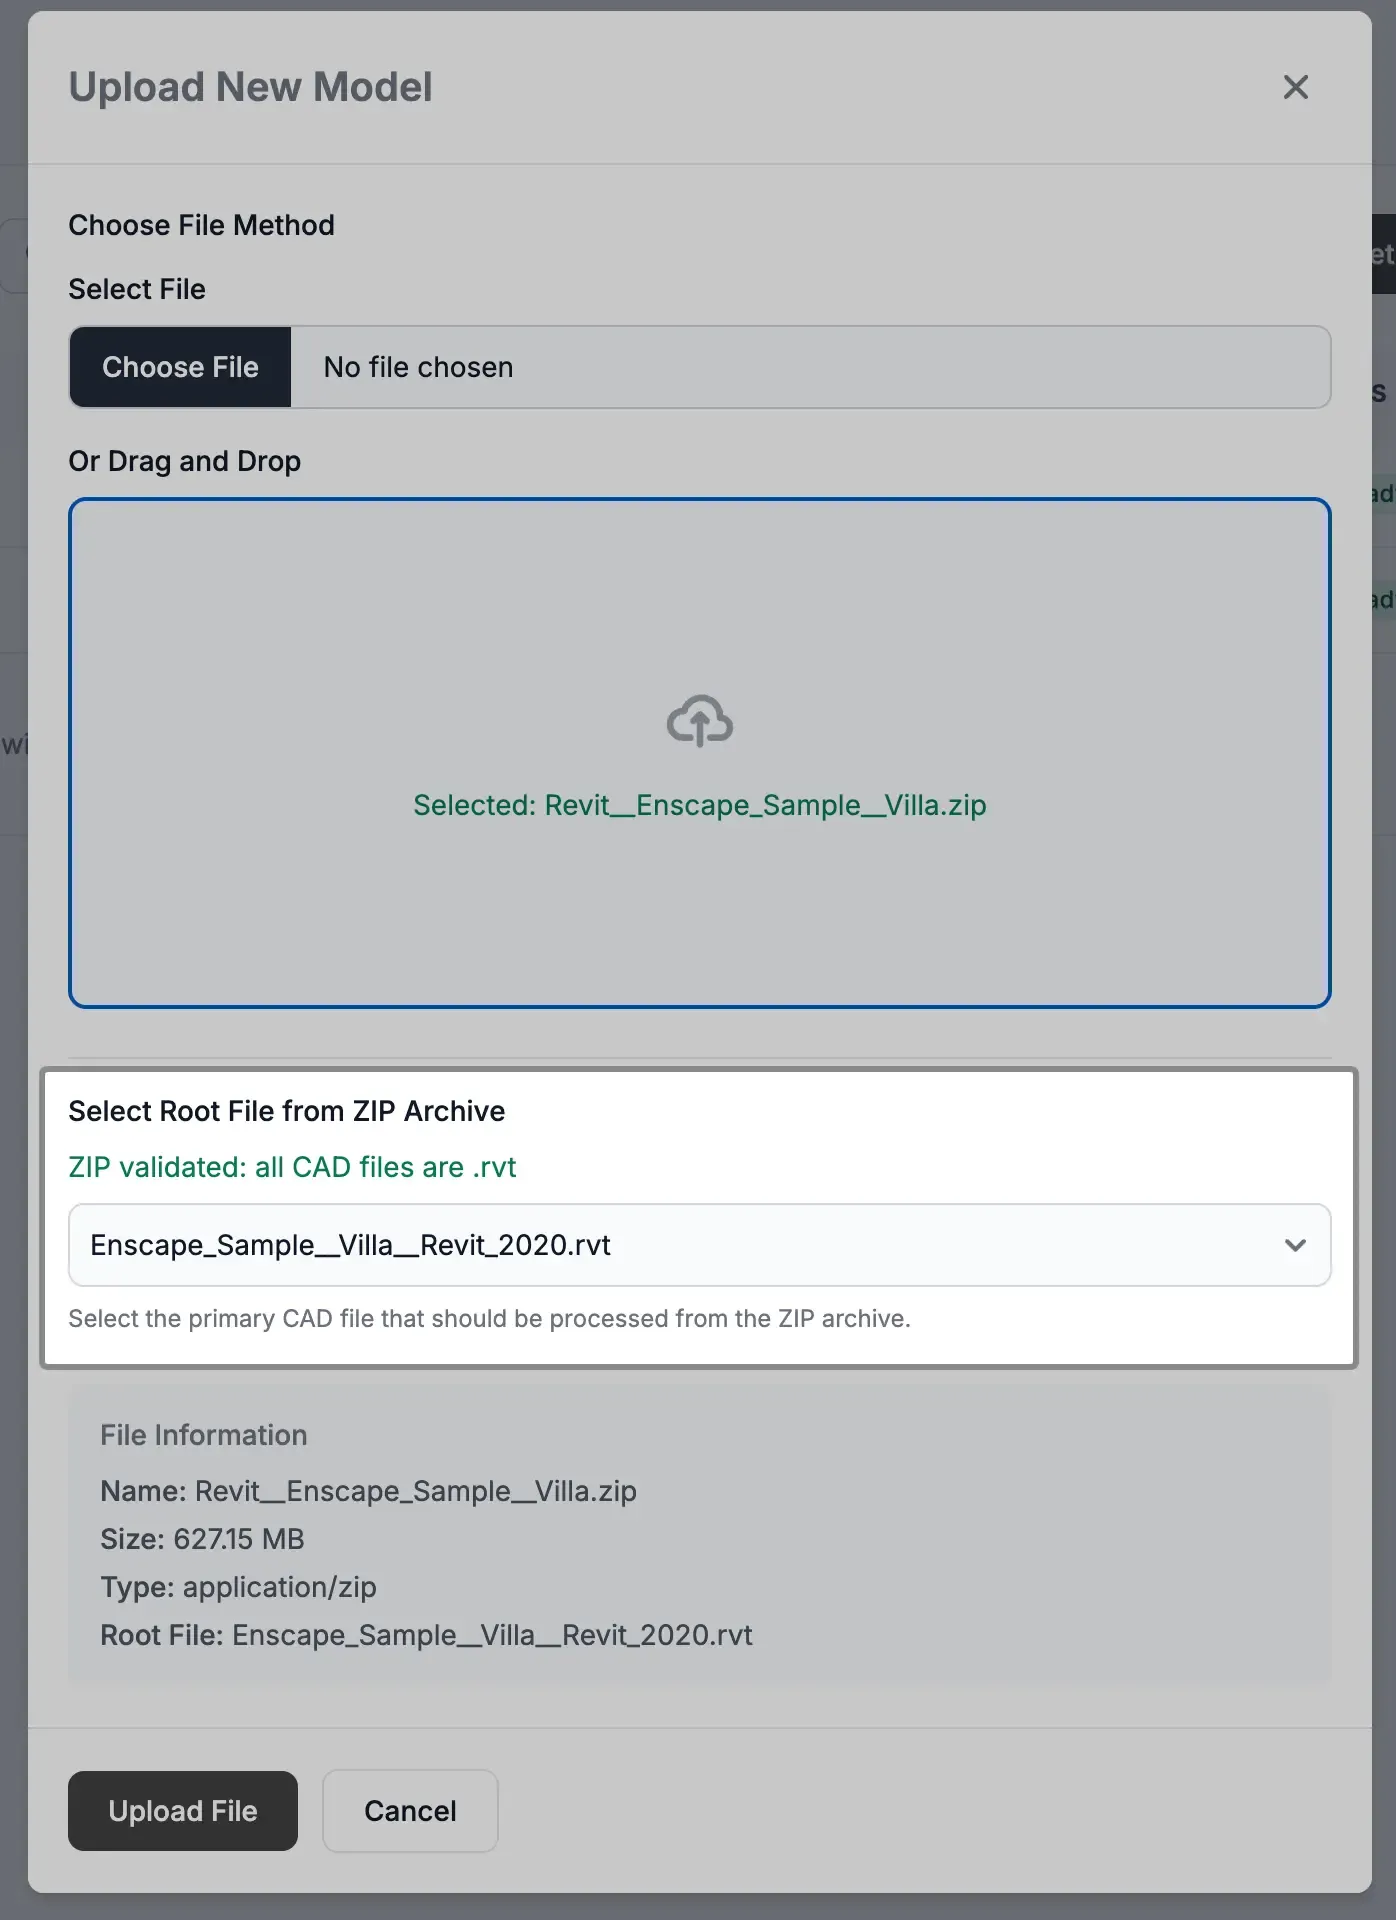
Section titled “ZIP upload”If you upload a ZIP package, you must indicate which file is the main model
that contains the links to the other files in the package.
Autodesk Construction Cloud
Section titled “Autodesk Construction Cloud”Choose Autodesk Construction Cloud (ACC) when the model already lives in ACC and you want to bring it into Frame from there. This path lets you select an ACC project and model instead of uploading files manually.
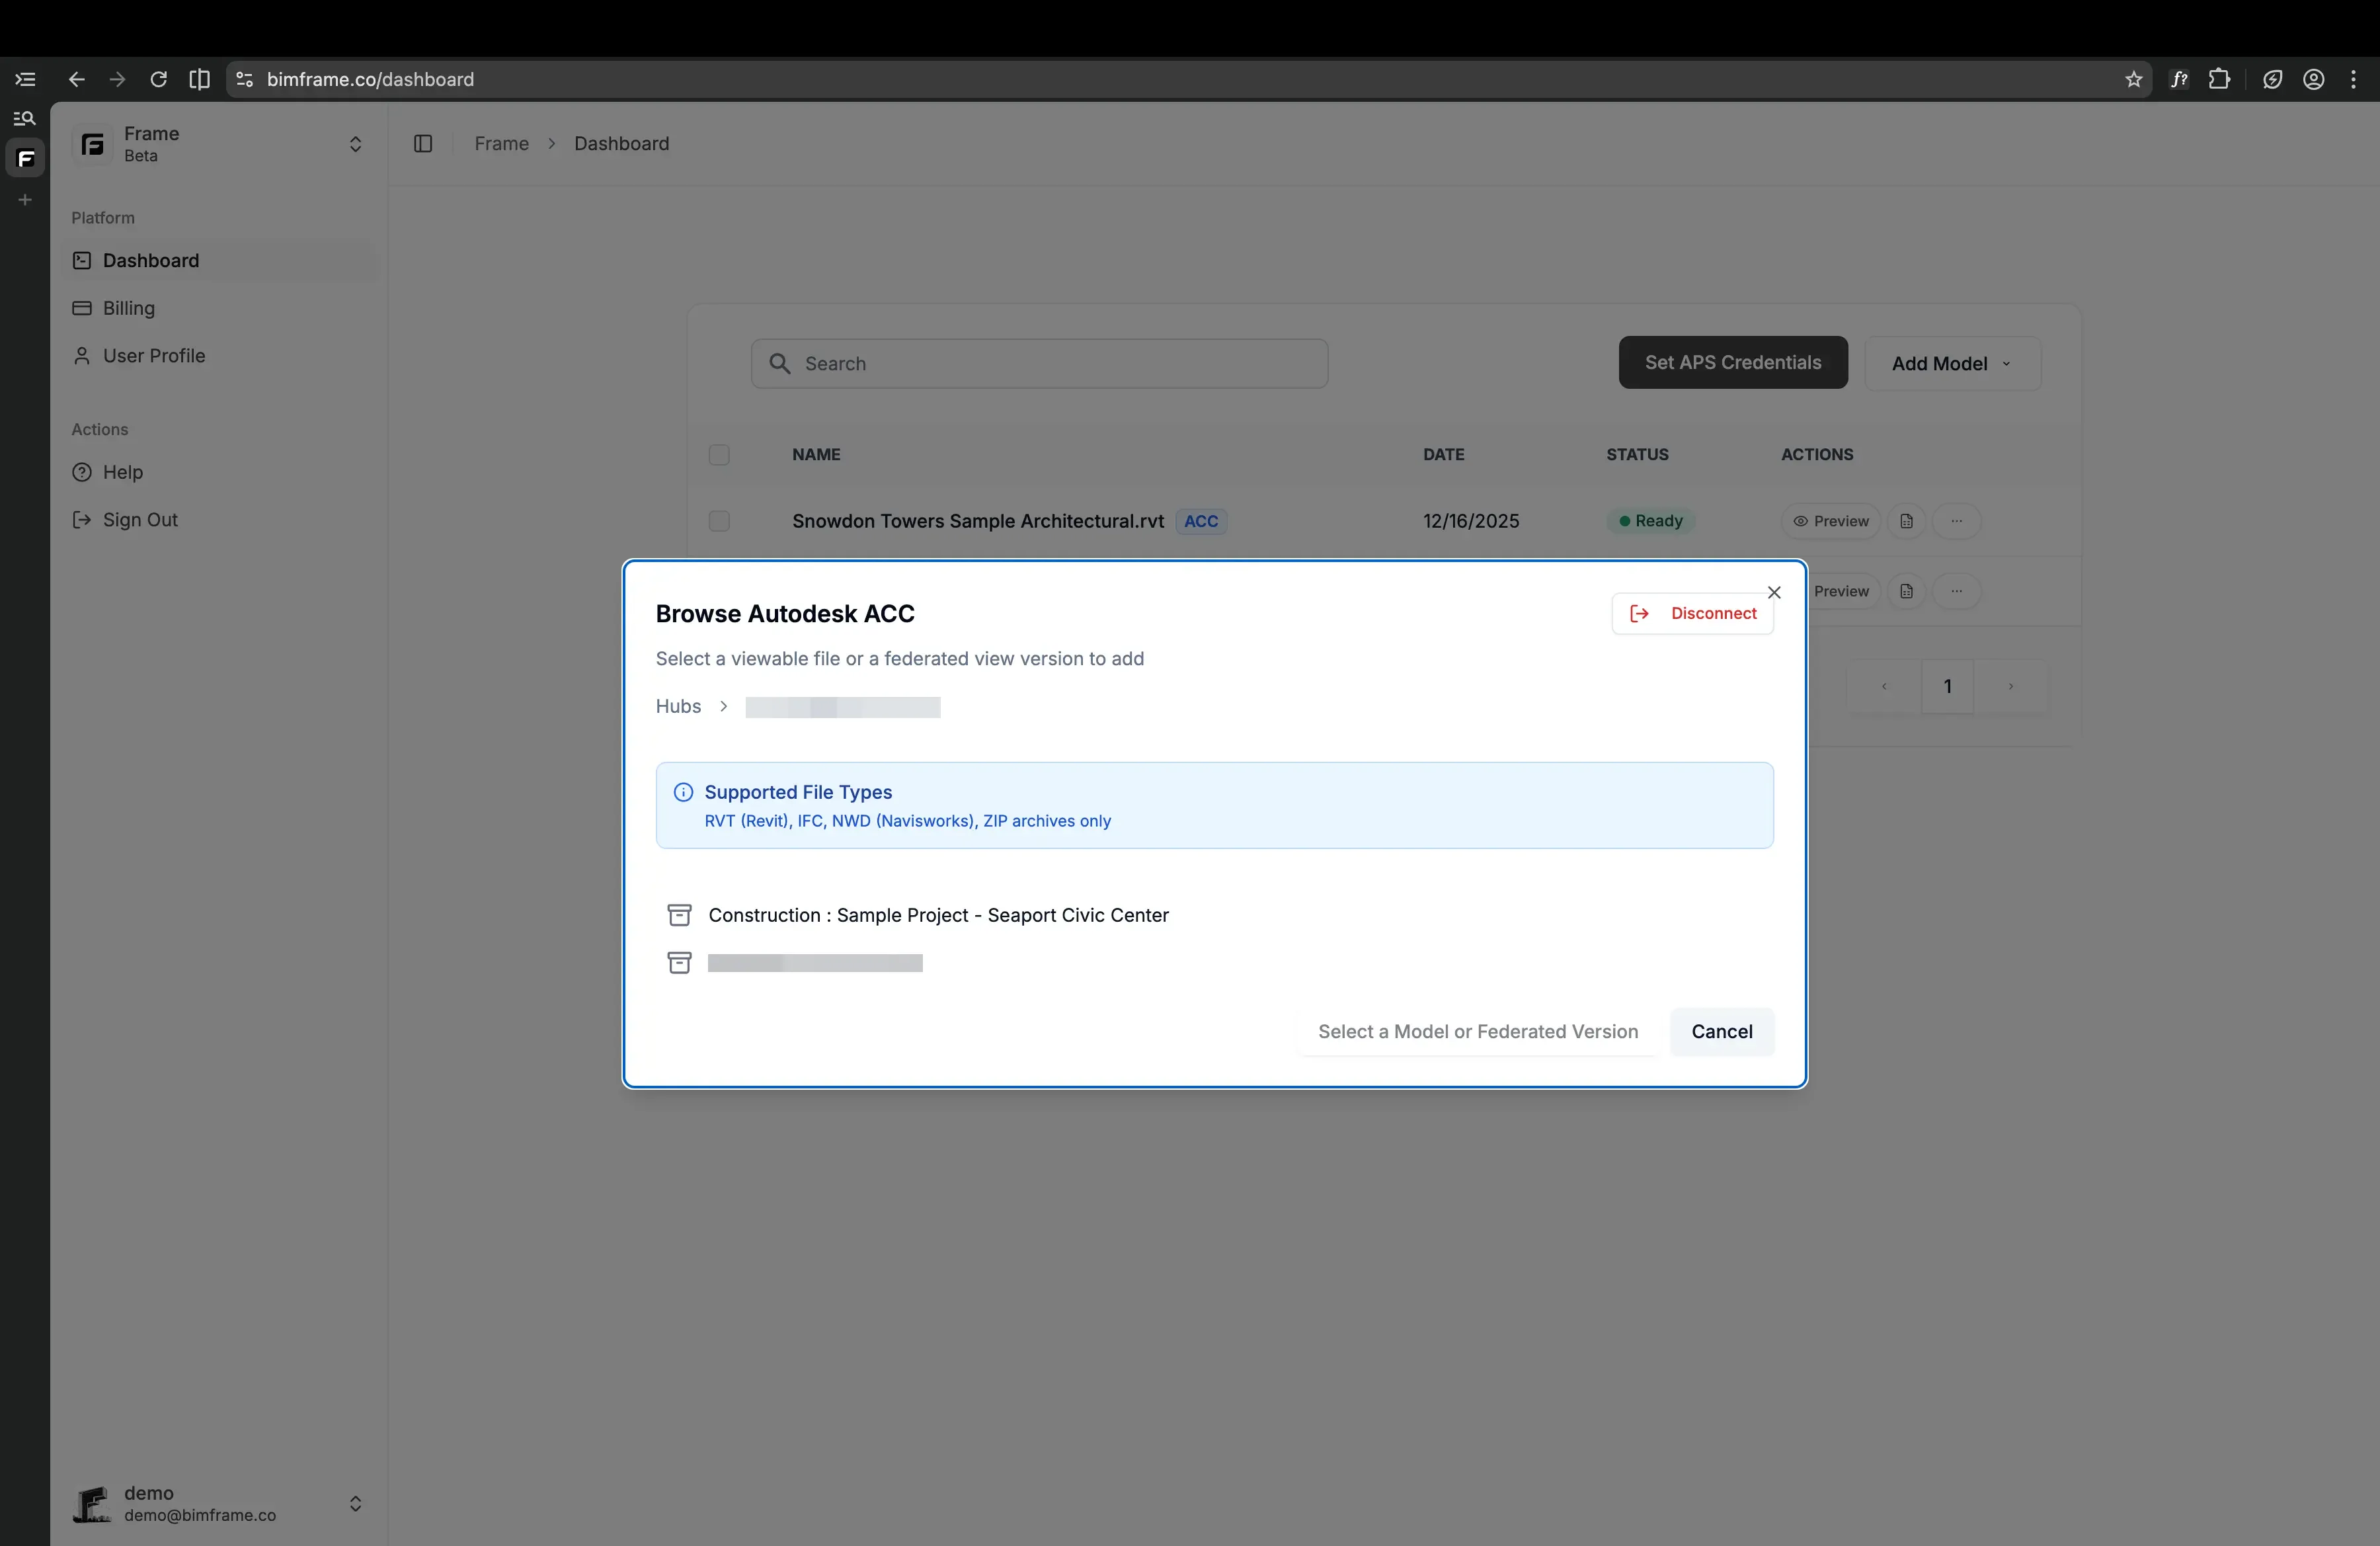
Selecting from ACC opens a modal with your ACC projects. From there, you can browse and locate the model you want, click it, and then choose Select model in the modal to add that model to Frame.
You can also browse and select federated views that you have saved in Docs from the ACC Coordination module.
After upload
Section titled “After upload”Once a model finishes processing:
- open it in the viewer
- generate a Power BI report
- or load it in the Excel Add-In
Continue to Viewer and markups if you want to review the model first.